Outdoor kitchen kits have become the shortcut homeowners need to skip the complexity of custom outdoor kitchen design. Instead of coordinating contractors, sourcing individual components, and managing a months-long project, these kits deliver coordinated cooking stations that fit together like high-end furniture. The outdoor kitchen market has matured significantly, what once meant a standalone grill now includes modular islands with storage, sinks, refrigeration, and even pizza ovens. For DIYers comfortable with basic carpentry and plumbing hookups, a quality kit can transform a patio in a weekend. The key is understanding what’s included, what requires separate purchase, and how to match the kit to the space and cooking style.
Table of Contents
ToggleKey Takeaways
- An outdoor kitchen kit delivers pre-designed modular components that fit together like furniture, saving homeowners time and money compared to custom masonry builds costing $8,000 or more.
- The four main outdoor kitchen kit types—island, modular component, masonry-style, and prefab drop-in—each suit different budgets, patios, and skill levels.
- Budget-breaking surprises are avoided by understanding what’s included (frame, cabinetry, countertop blank) versus what requires separate purchase (grill, plumbing, electrical, and most appliances).
- A level concrete slab, accurate measurements, and fire code clearance are essential before assembly; realistic all-in costs for a mid-range outdoor kitchen kit project range from $5,000 to $9,000.
- Regular maintenance—stainless steel cleaning, countertop sealing, hardware lubrication, and winterization in cold climates—keeps your outdoor kitchen durable for years of entertaining and grilling.
What Is an Outdoor Kitchen Kit and Why You Need One
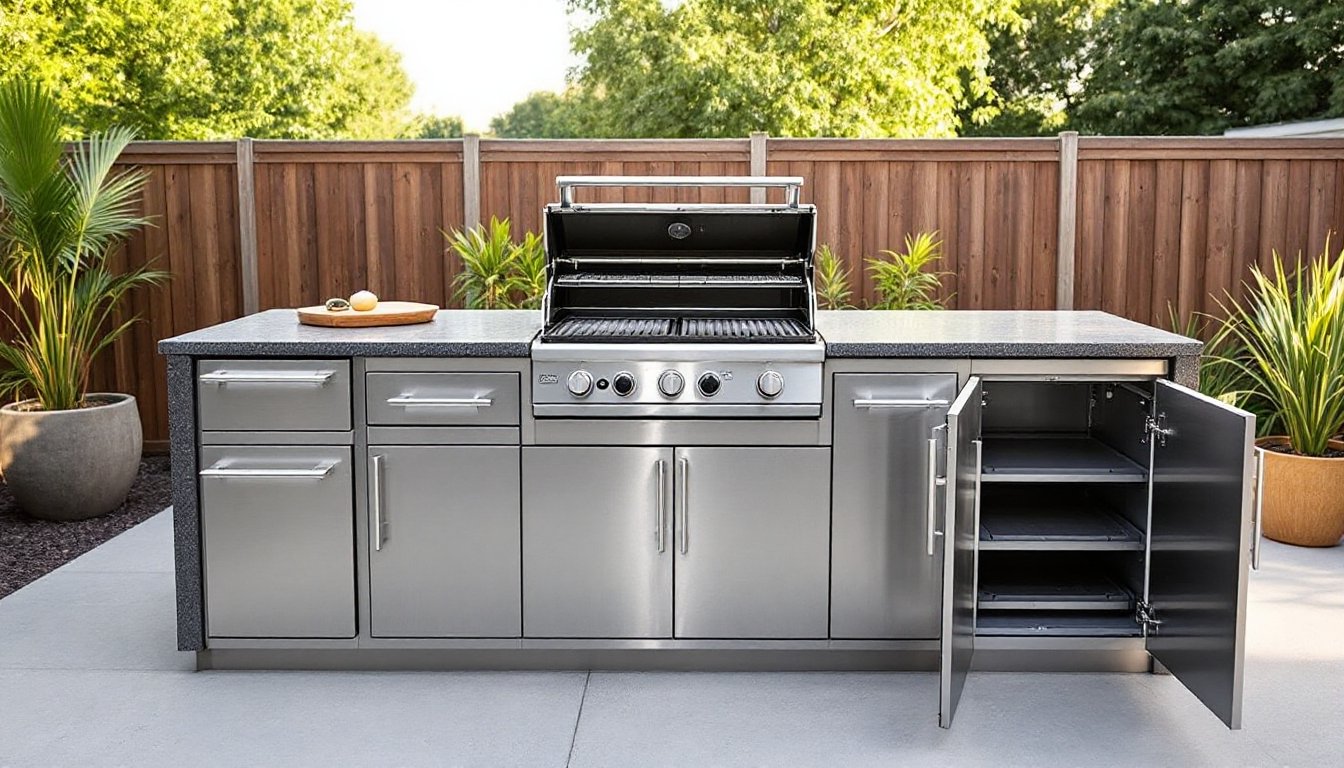
An outdoor kitchen kit is a pre-designed package of modular components, cabinets, countertops, grills, and sometimes appliances, that form a functional cooking station without custom fabrication. Kits typically include a frame (steel or aluminum), cabinetry panels (stainless steel, polymer, or stone veneer), a countertop blank or template, and cutouts sized for standard grill and appliance dimensions.
The main advantage is coordination. Manufacturers engineer components to fit together with consistent dimensions and finishes, eliminating the guesswork that comes with piecing together random big-box purchases. A kit also simplifies permitting in jurisdictions that require plans: many manufacturers provide stamped drawings or spec sheets that streamline approvals.
Homeowners save time and often money compared to hiring a masonry contractor to build a custom stone structure. A mid-range stainless steel island kit with a built-in grill, side burner, and storage runs between $2,500 and $6,000, whereas a comparable custom masonry setup often starts at $8,000 before appliances. The trade-off is flexibility, custom builds accommodate oddly shaped patios or specific aesthetic visions, while kits work best in standard rectangular or L-shaped configurations.
Kits also make future upgrades easier. Modular panels can be swapped or extended if the homeowner wants to add a beverage center or expand counter space. That’s harder to do once concrete and stone are set.
Types of Outdoor Kitchen Kits: Finding Your Perfect Match
Outdoor kitchen kits fall into four main categories, each suited to different budgets, climates, and skill levels.
Island kits are the most popular format, freestanding units that sit on a patio slab. They range from simple two-piece designs (grill cabinet plus side cabinet) to eight-foot islands with integrated sinks, refrigerators, and trash drawers. Most use a steel or aluminum frame with stainless steel doors and drawer fronts. These kits work well on concrete or paver patios with level surfaces.
Modular component kits offer maximum flexibility. Instead of a single island, the homeowner buys individual modules, a grill cabinet, corner unit, sink cabinet, bar seating extension, and arranges them in L-shapes, U-shapes, or along walls. This style suits larger patios or homeowners who plan to expand over time. The catch: each module must be leveled and fastened individually, which adds labor.
Masonry-style kits mimic the look of custom stone or brick construction using lightweight concrete panels, stone veneer, or stucco finishes over a metal frame. These kits appeal to homeowners who want the aesthetics of a built-in kitchen without hiring a mason. Assembly typically involves more steps, applying mortar or adhesive, grouting, and sealing, but the finished product integrates better with Mediterranean, Southwestern, or traditional home styles.
Prefab drop-in kits are the simplest option: a countertop frame with pre-cut openings for a grill and side burner, no cabinetry. These suit renters or DIYers on a tight budget who already own a standalone grill and want a cleaner setup. Installation is straightforward, set the frame on a base (cinder blocks or a low wall), drop in appliances, and connect gas or electric lines.
Essential Components Included in Quality Outdoor Kitchen Kits
Not all kits bundle the same components. Understanding what’s included versus what requires separate purchase prevents budget surprises.
Most kits include:
- Frame and structure: Steel, aluminum, or galvanized metal framework that supports countertops and cabinetry. Powder-coated finishes resist rust better than bare metal.
- Cabinet doors and drawer fronts: Stainless steel (304-grade resists coastal corrosion better than 430-grade), weatherproof polymer, or marine-grade plywood with laminate. Check for soft-close hinges, cheap hardware fails fast outdoors.
- Countertop blank or template: Many kits include a granite, concrete, or tile countertop. Others provide a template for a fabricator to cut stone. Tile-ready blanks with cement board backing are common in budget kits.
- Access doors and drawers: For storage and appliance access. Double-wall construction with weather seals keeps moisture out.
- Grill cutout and mounting hardware: Sized for standard built-in grill widths (typically 30″, 36″, or 42″). Some kits include the grill: most don’t.
What’s usually not included:
- Built-in grill: Unless explicitly stated, assume the kit provides only the cutout. Budget $800–$3,000 separately for a quality built-in grill (brands like Bull, Blaze, or Lion are common mid-range choices).
- Plumbing and electrical rough-ins: The homeowner handles water supply, drainage, and electrical circuits. A licensed plumber should run water lines: code requires GFCI outlets for outdoor electric.
- Appliances beyond the grill: Refrigerators, ice makers, beverage coolers, and warming drawers are add-ons. Ensure the kit has appropriately sized cutouts if appliances are planned.
- Backsplash or side panels: Some kits leave sides exposed, requiring additional finish panels or integration with a house wall.
Always read the detailed manifest before purchase. “Complete outdoor kitchen” in a product name doesn’t guarantee every component is in the box.
How to Choose the Right Outdoor Kitchen Kit for Your Space
Choosing a kit starts with accurate site measurements and honest assessment of DIY skill level.
Measure the footprint: Allow at least 48 inches of clearance in front of the grill for safe maneuvering with hot pans. If the patio backs up to a house wall, check local fire code, most jurisdictions require combustible siding to be at least 10 inches from grill surfaces, and some require non-combustible barriers.
Evaluate the surface: Kits require a level, stable base. A poured concrete slab (minimum 4 inches thick with rebar or wire mesh) is ideal. Pavers work if they’re laid on compacted gravel with sand leveling, but individual pavers can shift over time. Avoid placing heavy islands on wood decks unless a structural engineer confirms the joists and beams can handle the load, an eight-foot stone-topped island can exceed 800 pounds before appliances.
Consider utilities: Does the site have access to a gas line, water supply, and electrical service? Running natural gas from the house meter or propane from a remote tank requires licensed work in most areas. If the patio lacks plumbing, some homeowners opt for a garden hose adapter and a gray-water drainage system (check local codes, some prohibit gray water discharge). For electric, plan on a dedicated 20-amp GFCI circuit for receptacles, plus separate circuits if adding a refrigerator or other appliances.
Match materials to climate: In coastal or high-humidity areas, prioritize 304 stainless steel or marine-grade polymer. Powder-coated steel rusts faster in salt air. In arid climates, UV resistance matters more, cheap plastics fade and crack. For cold-climate zones, confirm appliances are rated for freezing temps or plan to winterize (drain water lines, disconnect gas, cover components).
Assess assembly complexity: Simple island kits with four to six pieces and bolt-together frames are manageable for a DIYer with basic socket wrenches and a level. Masonry-style kits requiring mortar, grouting, and stone veneer application take more skill and time, budget a full weekend and enlist help for lifting.
Budget for the full build: A $3,000 kit isn’t a $3,000 project. Add the grill ($800–$3,000), countertop fabrication if not included ($400–$1,200), plumbing rough-in ($300–$800), electrical work ($200–$600), and miscellaneous hardware, sealants, and covers. Realistic all-in costs for a mid-range setup run $5,000 to $9,000.
Installation and Assembly: What to Expect
Most island kits ship on a pallet in multiple boxes. Inspect all components before signing the delivery receipt, freight damage is common, and claims after acceptance are difficult.
Step 1: Prep the site. Sweep the patio and check for level using a 4-foot level in multiple directions. If the slab slopes more than 1/4 inch over four feet, shim the frame or pour a leveling pad.
Step 2: Assemble the frame. Lay out the frame components per the instructions. Most use corner brackets and bolt-together sections. Wear gloves, metal edges are sharp. Frames should be squared (measure diagonals: they should match) and leveled before tightening all fasteners.
Step 3: Install cabinetry panels and doors. Attach side panels, back panels (if included), and door hinges. Some kits use clips: others require screws into pre-drilled holes. Double-check door alignment before final tightening, outdoor cabinets that bind or hang crooked are difficult to adjust once loaded.
Step 4: Set the countertop. If the kit includes a stone or concrete top, recruit help, countertops for a six-foot island weigh 150+ pounds. Apply a bead of construction adhesive or silicone along the top of the frame, then lower the countertop into place. For tile-ready blanks, follow standard tile-setting procedures (thinset, tiles, grout, sealer).
Step 5: Install appliances and rough-ins. This step often requires a plumber and electrician. Gas lines must be pressure-tested and leak-checked with soapy water or an electronic detector. Water lines need shut-off valves accessible for future service. Electrical outlets require weatherproof covers and GFCI protection per NEC 210.8.
Step 6: Final touches. Attach hardware, install drawer glides, and caulk seams where the countertop meets cabinetry. Apply a stainless steel cleaner to remove fingerprints and packing residue.
Typical assembly time: 8–16 hours for a straightforward island kit, not counting utility rough-ins. Masonry kits or multi-module layouts can take 20+ hours.
Maintenance Tips to Keep Your Outdoor Kitchen Kit Looking New
Outdoor kitchens endure UV exposure, temperature swings, and moisture, regular upkeep prevents premature wear.
Stainless steel surfaces: Wipe down after each use with a microfiber cloth and mild detergent. For stubborn grease, use a stainless cleaner or a paste of baking soda and water, rubbing with the grain to avoid scratches. In coastal areas, rinse monthly with fresh water to remove salt buildup that causes pitting.
Countertops: Granite and concrete should be resealed annually with a penetrating sealer. Tile grout benefits from a grout sealer to resist staining. Avoid acidic cleaners (vinegar, citrus) on natural stone, they etch the surface.
Cabinetry hardware: Lubricate hinges and drawer glides twice a year with a silicone spray. Check fasteners for rust: replace with stainless hardware if needed.
Grill maintenance: Clean grates and burner covers after every few uses. Inspect burner tubes for spider nests or debris, clogs cause uneven flames and can crack components. Empty grease traps weekly to prevent flare-ups and animal intrusion.
Plumbing: In freezing climates, winterize before the first hard freeze. Shut off water supply valves, open faucets to drain lines, and blow out residual water with an air compressor. Disconnect and store removable faucet components indoors.
Covers: Invest in a fitted, breathable cover. Waterproof vinyl or polyester covers with vents prevent mildew. Avoid cheap tarps, they trap condensation and accelerate rust.
Annual inspection: Check caulk and sealant joints for cracks. Inspect the frame for rust or loose fasteners. Test GFCI outlets and confirm gas connections remain leak-free.
Conclusion
Outdoor kitchen kits eliminate much of the guesswork and coordination that make custom builds intimidating. For DIYers with a level patio, basic tool skills, and access to licensed trades for utilities, a quality kit delivers a professional-looking cooking station without the custom price tag. The key is choosing components that match the climate, measuring carefully, and budgeting realistically for appliances and rough-ins. With proper maintenance, a well-assembled outdoor kitchen can handle years of grilling, hosting, and weather exposure.