Building an outdoor kitchen without a backsplash is like installing cabinets without drawer pulls, functionally incomplete. A backsplash isn’t just cosmetic: it protects walls from grease splatter, heat damage, and moisture while defining the cooking zone. For homeowners investing in outdoor cooking setups, choosing the right backsplash material and installation method determines whether the project holds up through seasons of grilling, rain, and temperature swings. This guide covers material selection, design approaches, and installation practices that stand up to weather while elevating the look of any backyard cooking area.
Table of Contents
ToggleKey Takeaways
- An outdoor kitchen backsplash is essential functional protection against grease splatter, heat damage, and moisture while defining your cooking zone visually.
- Porcelain tile is the top material choice for outdoor kitchen backsplashes due to its low water absorption rate and frost-resistance, making it ideal for freeze-thaw climates.
- Proper surface preparation, including power-washing and complete drying, is critical—walls must be clean and structurally sound before installation begins.
- Use exterior-rated thin-set mortar and epoxy or urethane grout to ensure weather resistance and longevity in outdoor conditions.
- Expansion joints filled with silicone caulk, rather than grout, prevent cracking as materials expand and contract with temperature changes.
- Annual sealing of natural stone and regular maintenance keep your outdoor kitchen backsplash protected and looking finished season after season.
Why Your Outdoor Kitchen Needs a Backsplash
Outdoor kitchens face conditions indoor spaces never encounter. Without a backsplash, exterior walls absorb grease, smoke stains, and water from both cooking and weather exposure. Porous surfaces like stucco or unfinished stone quickly deteriorate when hit with repeated splatter and moisture cycles.
A properly installed backsplash creates a cleanable barrier that simplifies maintenance. Instead of scrubbing stucco or replacing rotted siding, homeowners wipe down tile or stone panels. This barrier also protects the structural wall behind the cooking surface from heat damage, especially critical near grills, pizza ovens, or side burners that generate sustained high temperatures.
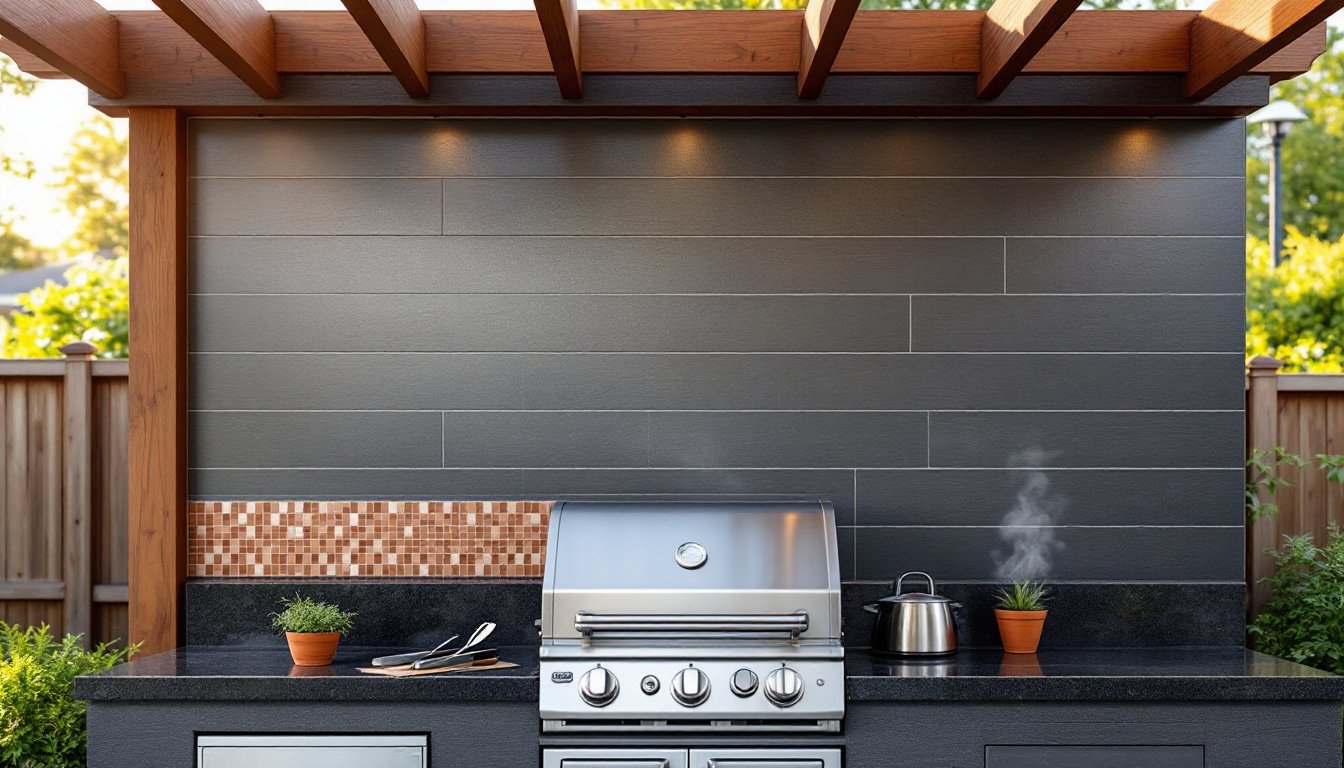
Beyond function, a backsplash visually anchors the cooking zone. It separates the kitchen area from surrounding landscaping or architectural features, giving the space a finished, intentional look. For homes with covered patios or pergola-shaded outdoor kitchens, the backsplash adds a focal point that ties together countertops, cabinetry, and appliances. It’s the detail that signals a well-planned cooking area rather than a grill shoved against a wall.
Best Materials for Outdoor Kitchen Backsplashes
Stone and Tile Options
Porcelain tile leads the pack for outdoor backsplashes. Unlike ceramic, porcelain’s low water absorption rate (typically under 0.5%) makes it frost-resistant and suitable for climates with freeze-thaw cycles. Full-body porcelain, where the color runs through the entire tile thickness, hides chips better than surface-glazed options. Standard 12″×24″ or 6″×36″ planks install quickly and offer modern, clean lines.
Natural stone brings texture and earthy character but demands more care. Granite and slate handle weather well due to their density and low porosity. Travertine and limestone look striking but require annual sealing to prevent water infiltration and staining. Stack stone panels (real or manufactured) create dimensional interest and hide minor wall irregularities, though their uneven surface makes cleaning grease more tedious.
Glass tile works in covered outdoor kitchens where UV and temperature extremes stay moderate. It’s easy to clean and reflects light beautifully, but glass can crack under rapid temperature shifts or impact. Homeowners in mild climates often use glass as an accent band within a more durable tile field.
Weather-Resistant Alternatives
Stainless steel panels excel in modern outdoor kitchens. They’re heat-resistant, non-porous, and wipeable, though they show fingerprints and water spots. Use 16-gauge or heavier panels: thinner steel dents easily. Install with a 1/4″ air gap behind the panel to allow drainage and prevent trapped moisture from corroding the mounting surface.
Fiber cement board with a tile or stone veneer overlay offers a budget-friendly option. Products like HardieBacker resist moisture and provide a stable substrate for thin-set mortar. The board itself isn’t decorative, it needs a finish layer, but it simplifies installation on uneven surfaces like stucco or concrete block.
Marine-grade polymer panels mimic tile or stone patterns and install with adhesive or mechanical fasteners. They’re lightweight, UV-stable, and immune to freeze-thaw damage. The trade-off: they lack the authentic look and feel of real stone, and some homeowners find the plastic appearance cheapens high-end outdoor kitchens.
Avoid standard ceramic tile (too porous), untreated wood (rots and warps), and peel-and-stick vinyl (adhesive fails in heat). Materials acceptable indoors often fail within a season outdoors.
Design Ideas to Match Your Outdoor Style
A monochromatic stack stone backsplash in charcoal or sand tones complements contemporary outdoor kitchens with stainless appliances and concrete countertops. The dimensional surface adds tactile interest without competing with clean-lined cabinetry. Run the stone to the underside of a pergola beam or range hood for a cohesive vertical plane.
Subway tile layouts suit transitional and traditional spaces. A 3″×6″ white or cream subway tile in a running bond pattern keeps the focus on the cooking area without overwhelming. A contrasting grout, dark gray with white tile, for example, emphasizes the grid and makes the backsplash pop. For a twist, install the tile in a vertical stack bond or herringbone pattern.
Large-format porcelain slabs (up to 5’×10′) create a seamless, grout-minimal look favored in modern and minimalist designs. These slabs require professional installation due to their size and weight, but the result is striking: a single piece behind the entire cooking surface with no grout lines to clean or maintain. Book-matched veining in marble-look porcelain elevates the space to indoor-kitchen quality.
Mosaic accent bands inject color and personality. A 4″ horizontal stripe of glass or ceramic mosaic at mid-height breaks up a field of neutral tile. Popular combinations include terracotta mosaics with travertine, or ocean blues with white subway tile in coastal settings. Keep mosaics away from the immediate grill zone, grease embeds in small grout lines.
Full-wall coverage vs. partial splash depends on the kitchen layout. A backsplash that extends from the countertop to an overhead structure creates a dramatic, room-like feel in covered kitchens. In open-air setups, a 24″–30″ backsplash height protects the wall without blocking sightlines to the yard.
Installation Tips for Long-Lasting Results
Surface prep determines longevity. Outdoor walls must be clean, dry, and structurally sound. Power-wash stucco or masonry to remove dirt, algae, and loose material. Let the wall dry completely, at least 48 hours in dry weather, longer if humid. Fill cracks wider than 1/8″ with exterior-grade mortar or epoxy patching compound. Walls that aren’t plumb or flat may need a skim coat or backer board overlay.
Use modified thin-set mortar rated for exterior use and freeze-thaw resistance. Products meeting ANSI A118.4 or A118.15 standards bond to concrete, stucco, and cement board in outdoor conditions. Mix to a peanut butter consistency, too wet and tiles slide: too dry and the bond fails. Apply mortar with a 1/4″ × 1/4″ square-notch trowel for most tiles: large-format or heavy stone may require a 1/2″ notch.
Back-butter heavy tiles. Spread a thin layer of mortar on the back of each stone or large-format tile plus to the wall coat. This ensures full contact and eliminates voids where water can collect and freeze.
Grout selection matters outdoors. Standard sanded grout absorbs water and stains. Opt for epoxy grout or urethane grout for maximum stain and weather resistance. Epoxy is harder to work with, it sets fast and requires immediate cleanup, but it’s nearly impervious to moisture and grease. Urethane grout offers easier application with strong performance, though it costs more. For natural stone, verify the grout won’t stain the material: always seal porous stone before grouting.
Seal everything. Apply a penetrating sealer to natural stone and grout after installation. Re-seal annually or per the product’s recommendation. Porcelain tile typically doesn’t need sealing, but check manufacturer guidance.
Expansion joints prevent cracking. Outdoor materials expand and contract with temperature swings. Leave a 1/8″–1/4″ gap at inside corners, where the backsplash meets countertops, and at any transition to a different material. Fill these joints with color-matched silicone caulk (not grout). Silicone flexes, preventing cracks as materials move.
Safety gear is non-negotiable. Wear safety goggles when cutting tile with a wet saw or angle grinder, porcelain shards fly fast. Use nitrile gloves when handling thin-set and grout: both irritate skin. A dust mask or respirator is essential when dry-mixing mortar or cutting cement board, especially in enclosed or covered spaces.
Permits generally aren’t required for backsplash installation, but if the project involves modifying a load-bearing wall, adding electrical outlets behind the backsplash, or constructing a new outdoor structure, check local building codes. Gas line work near grills or outdoor appliances requires a licensed professional.
Conclusion
An outdoor kitchen backsplash isn’t optional, it’s the barrier that keeps weather and grease from wrecking walls while finishing the space with intentional style. Choosing weather-resistant materials, prepping surfaces thoroughly, and using the right adhesives and sealers ensure the backsplash lasts through seasons of hard use. Whether installing sleek porcelain slabs or textured stone, attention to expansion joints and proper grouting separates projects that endure from those that crack by spring.