An outdoor kitchen is only as functional as its layout. A poorly planned cooking zone turns cookouts into chaos, bottlenecked traffic, dangerous hot spots, and prep surfaces too far from the grill. A well-designed outdoor kitchen layout, on the other hand, streamlines meal prep, keeps guests safe, and turns the backyard into a natural gathering hub. Unlike an indoor kitchen constrained by walls and plumbing, outdoor spaces offer flexibility but demand intentional planning around weather exposure, utilities, and traffic flow. This guide breaks down the practical design strategies, measurements, and zone configurations that make outdoor kitchens work for real cooking, not just photo ops.
Table of Contents
ToggleKey Takeaways
- A well-designed outdoor kitchen layout prioritizes safety by maintaining at least 10 feet of clearance from structures and ensuring proper 3-foot spacing around grills to prevent fire code violations and protect guests.
- The core work zones—cooking, prep, refrigeration, storage, and dining—must be strategically positioned to streamline workflow, with the prep zone positioned upwind of the grill and refrigeration within 4 to 6 feet of prep surfaces.
- The L-shaped, island, and galley layouts each offer distinct advantages depending on your yard space and cooking style, with the L-shaped layout being ideal for patios and the galley layout perfect for narrow side yards.
- Precise measurements matter: counters should be 36 inches high, 24 to 30 inches deep, with 42 to 48 inches of clearance in front of the grill for safe and efficient movement.
- Outdoor kitchen layout decisions directly impact long-term material durability and maintenance costs, as proper drainage, utility placement, and expansion joint spacing prevent water damage, electrical hazards, and cracking.
- Always verify local building codes, permits, and HOA restrictions before construction, as outdoor kitchen projects involving gas lines, electrical work, or structures over 120 square feet typically require inspections and permits.
Why Your Outdoor Kitchen Layout Matters More Than You Think
Layout dictates safety, efficiency, and longevity. Poor spacing between a grill and combustible materials violates fire codes in most jurisdictions, many local ordinances require at least 10 feet of clearance from structures or overhangs. Ignoring this risks insurance claims and structural damage.
Workflow matters just as much. The classic kitchen work triangle (sink, stove, refrigeration) applies outdoors, but wind, sun angles, and foot traffic add variables. Placing a prep counter downwind of a charcoal grill fills food with ash. Positioning a refrigerator in direct afternoon sun forces the compressor to work overtime, shortening its lifespan and spiking energy costs.
Material durability ties directly to layout choices. Outdoor kitchens face UV exposure, rain, freeze-thaw cycles, and temperature swings. A layout that traps water against cabinetry or leaves electrical components exposed to weather creates maintenance headaches. Proper placement of overhead cover, drainage slopes, and utility access points prevents expensive repairs down the line.
Permits often hinge on layout. Adding gas lines, electrical circuits (especially 20-amp GFCI-protected outlets required by NEC for outdoor receptacles), or permanent structures typically requires permits. A layout that keeps utilities surface-mounted and avoids structural modifications may sidestep permitting in some jurisdictions, but always check local codes before breaking ground.
Essential Zones to Include in Your Outdoor Kitchen Layout
Every functional outdoor kitchen breaks into distinct work zones. Skipping any one creates inefficiency or safety risks.
Cooking Zone: This is the grill, smoker, or built-in cooktop. Allow minimum 3 feet of counter space on either side for plating and tool staging. Built-in grills need ventilation, never enclose a gas grill completely without adequate airflow, which can trap gas and create explosion hazards. Side burners fit here if the cook needs to simmer sauces or boil corn while grilling mains.
Prep Zone: Dedicated counter space for chopping, seasoning, and assembly. 6 to 8 linear feet of weatherproof countertop (concrete, granite, or sealed tile) provides enough room for cutting boards, mixing bowls, and ingredient staging. Position this zone upwind of the grill to keep smoke and heat away from raw food. If budget allows, run a cold water line to a prep sink, it eliminates trips indoors and simplifies cleanup.
Refrigeration Zone: An outdoor-rated refrigerator, beverage cooler, or built-in ice maker. Standard indoor fridges fail outdoors: look for units rated for ambient temperatures above 100°F and weatherproof construction. Place this within 4 to 6 feet of the prep zone to minimize steps during meal assembly.
Storage Zone: Weatherproof cabinets for utensils, propane tanks, trash bins, and dry goods. Marine-grade polymer or stainless steel cabinetry holds up better than wood, which warps and rots even though sealant. Include a pull-out trash drawer with a lid, open bins attract pests.
Dining/Serving Zone: This can be a bar-height counter with seating or a separate dining table. If integrating a serving counter, position it opposite the cooking zone so guests don’t crowd the cook. Bar counters typically sit at 42 inches high with 24-inch-deep overhangs for stool seating.
Utility Access: Don’t overlook gas line shutoffs, electrical panels, and hose bibs. Every outdoor kitchen needs a water source within 10 feet and accessible shutoffs for gas and electric in case of emergency.
Popular Outdoor Kitchen Layout Designs That Work
Choosing a layout depends on available space, cooking style, and how many people typically use the area simultaneously. Here are the three most reliable configurations.
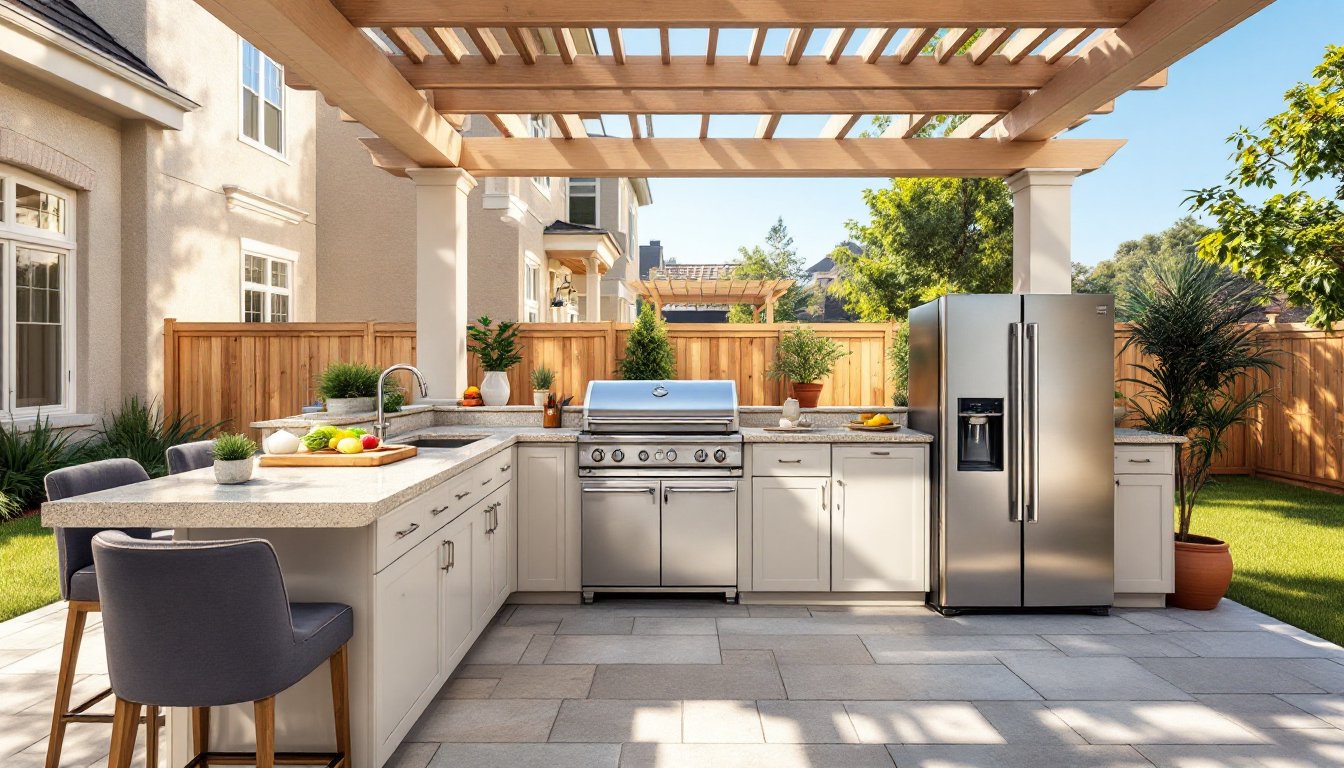
The L-Shaped Layout
The L-shaped design anchors two perpendicular counter runs, creating a natural work triangle. One leg typically houses the grill and side burner: the other holds the prep sink and refrigeration. This layout works well on patios or decks where one side backs against a fence or house wall (maintaining proper clearances).
Advantages: Opens to the yard or seating area, keeping the cook engaged with guests. Provides 8 to 12 feet of total counter space without demanding a huge footprint. Corners can accommodate storage cabinets or a trash pullout.
Considerations: The corner joint requires careful planning for cabinet access, blind corners waste space unless fitted with lazy Susans or pull-out organizers. Utility runs (gas, water, electric) are easiest if one leg aligns with the house exterior, where existing lines can extend.
The Island Layout
A freestanding island centralizes all cooking, prep, and storage in one structure, often with seating on one or more sides. This layout suits larger yards with ample patio space, minimum 12 feet by 12 feet of hardscape to allow clearance around all sides.
Advantages: Maximum counter space and storage in a compact footprint. The cook faces guests on all sides, making it ideal for entertaining. Islands can house grills, sinks, refrigerators, and bar seating in one integrated unit.
Considerations: Requires utility trenches or conduit runs from the house, since nothing backs to a wall. Plumbing and gas lines must run underground, which adds cost and often requires permits. Overhead coverage (pergola, pavilion) is harder to integrate without posts interrupting the island.
The Galley Layout
Two parallel counter runs create a corridor workspace, similar to a ship’s galley. One side holds cooking equipment: the other handles prep and serving. This layout fits narrow side yards or spaces between a house and a fence.
Advantages: Efficient work triangle with everything within arm’s reach. Minimal wasted movement, perfect for serious cooks who prioritize workflow over socializing. Works in tight spaces where L-shaped or island layouts won’t fit.
Considerations: The corridor should measure 4 to 5 feet wide, narrower feels cramped: wider creates unnecessary steps. This layout doesn’t encourage guest interaction: the cook works with their back to the seating area. Ensure one end remains open to prevent a dead-end traffic trap if multiple people need access.
Key Measurements and Spacing Guidelines for Optimal Flow
Precise measurements prevent costly rebuilds and unsafe conditions. These dimensions come from commercial kitchen standards adapted for residential outdoor use.
Counter Height: Standard outdoor kitchen counters sit at 36 inches, matching indoor kitchen height. Bar counters for seating rise to 42 inches. If building custom, verify height with the primary cook, taller users often prefer 38-inch prep surfaces to reduce back strain.
Counter Depth: Base counters run 24 to 30 inches deep, providing enough workspace without overreach. Bar overhangs for seating extend 12 to 15 inches beyond the base cabinet to accommodate knees and stools.
Aisle Width: Allow 42 to 48 inches of clearance in front of the grill and main prep areas. This accommodates one person working plus another passing behind. Galley layouts need 48 to 60 inches between facing counters if two cooks share the space.
Grill Clearances: Gas and charcoal grills generate intense heat. Maintain 10 inches minimum from combustible side walls (wood, vinyl siding). Overhead clearance depends on BTU output, but 3 feet minimum to any roof or pergola beam is standard. Check the grill manufacturer’s specs, some high-BTU models require more.
Electrical Spacing: NEC requires at least one 20-amp GFCI-protected receptacle for outdoor kitchens, positioned within 6 feet of the cooking surface. If adding a refrigerator, it needs a dedicated circuit. All outdoor outlets must be weatherproof with in-use covers if devices remain plugged in.
Plumbing Considerations: Outdoor sinks need drainage. A French drain or connection to the home’s sewer line handles wastewater. In cold climates, install shutoff valves indoors and slope supply lines for winterization, freezing pipes burst and crack concrete countertops.
Safety Zones: Keep seating areas 6 feet minimum from open flames. This prevents accidental contact and reduces crowding around hot surfaces. If children or pets frequent the area, consider barriers or install the grill at the far end of the layout.
Material Expansion: Concrete, stone, and tile expand with heat. Leave ¼-inch expansion joints every 8 to 10 feet on long counter runs to prevent cracking. Use backer rod and polyurethane sealant rated for outdoor use.
Before finalizing any layout, verify local building codes and HOA restrictions. Many municipalities regulate outdoor structure setbacks, maximum square footage, and utility installations. Obtaining permits upfront prevents teardown orders and ensures resale value. If the project includes gas lines, electrical work beyond simple outlet installation, or permanent structures exceeding 120 square feet, expect to pull permits and schedule inspections.